Greetings! For the past few weeks, I’ve been working on project Arduino with my partner in crime, Autumn. We’ve been dividing our time between taking care of the usual business at the CTS Help Desk and the more intriguing exercises which are soldering and coding with Arduino Uno.
Arduino is an open source electronics platform accompanied with a hardware and software to design, develop and test complex electronics prototypes and products. The hardware consists of a micro controller with other electronic components which can be programmed using the software to do almost any task. The simplicity of the Arduino language makes it very easy for almost everyone who has an interest in electronics to write programs without the understanding of complex algorithms or codes.
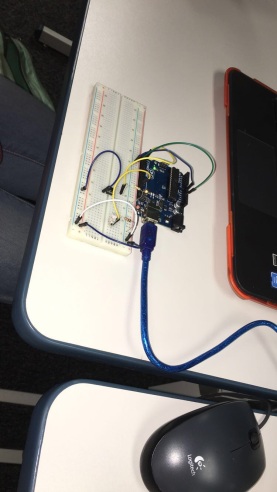
We began our journey by gathering the solderless breadboard and the blink circuit, along with some solderless breadboard wires. Then we begin to connect the wires between the blink circuit and the breadboard, one by one accordingly. Next, we needed to input a resistor along with a red LED (light emitting diode). Then we linked the circuit board with an USB Cable to our Chromebook to be able to transmit the coding from Codebender into the circuit board. The code. in short, generate inputs into the LED and accelerate powers into it, allowing it to light up.

Next, we had to get up to speed on soldering, code libraries, addressable LEDs, and organizing code with functions. We’ll use soldering to attach wires onto a piece of NeoPixel strip, so we can plug it into the solderless breadboard. Soldering is quite a task to handle, so like always, we had to take safety precaution…GLOVES and GOGGLES!!!
For a more in-depth step-by-step walk through on how to perform this project, visit:
Arduino – https://www.arduino.cc/en/Guide/Introduction
Arduino Instructables – http://www.instructables.com/technology/arduino/


